Posts Tagged ‘dollies’

The tanks ends were the next components to take shape.  They are identical in construction, geometrically mirroring each other, although one was destined to have a hole for the filler neck added at a later stage.

My hammer forms, made from tough plywood are identical.  I marked the most accurate half as the die but wasn’t sure if the plywood would withstand the rigours of making two pieces.  With two identical forms I had the option of switching to the second one if the first lost it’s crisp edges.  As it turns out I needn’t have worried as the die survived almost unscathed.  Just as well because I had further plans for it….

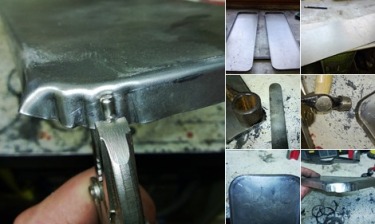
I learned an awful lot from these pieces.  I got nice crisp angles but couldn’t get anything like enough shrinkage on the corners hammering onto the plywood.  I tried heat but with only a blowtorch, was not successful.  I found a piece of Transit van leaf spring which was just the right radius for the corners and used a combination of tucks using my vise grip crimping tool and hammering onto the makeshift dolly to get it close. Then I switched to a technique that I’ve seen done by others, David Gardiner demonstrates it on his training DVD but I’d never been able to master it.  Practice makes perfect though and eventually it clicked!  The technique involves hammering obliquely on the edge of the turned flange to force the metal into itself.  The angle of the blows, weight and effort all require precision and this is something you have to learn with practice.  The first couple of corners I chased the spare metal back and forth but by the eighth corner I was a dab hand!
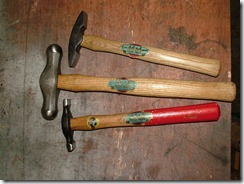
Thank you eBay!  After becoming aware that it is very difficult to obtain good quality Blocking hammers any more I thought I’d better find myself one while I can.  Fortunately I immediately stumbled across a vendor selling an assortment of “New Old Stock” Wm. Whitehouse hammers, once made at the Atlas Forge just up the road in DSCF1923Sheffield.

I bagged a lovely 2lb Blocking hammer, a raising hammer and a cross pein hammer of unknown purpose which will be very useful for stretching flanges.  All they needed to bring them up to scratch was an hour with a Scotchbright pad and a can of WD40.

I can’t wait to bash stuff!

When I strip the interior out of Pandora to fit the new windows and roof structure i want to tackle the sills and wheel arches at the same time.  So I’ve started to make the parts for these too.

Today I’ve made a wheel arch repair.  It’s not quite finished as it needs some final dressing and the flanges turning where it joins to the adjacent panels.  I’ll have to do this last bit once I have the old metalwork cut out.

As with so many jobs the starting point was to make an FSP. This gave me a cutting pattern and allowed me to transfer the feature lines onto the steel sheet which I’d wheeled all over to form a slight crown.  Using the lines as a guide I leathered seven bells out of the flared portion of the arch on the sandbag with a bossing mallet.  Alternating between the bossing mallet and the English Wheel to get a smooth flare of the right size.  Then I turned a lip with the MKI Lipping Tool I made for the Spider arch a few weeks back.  It’s taken about 8 hours and there’s another hour of dressing to do when I fit it but I’m pretty happy with the result…

This slideshow requires JavaScript.

I’ve been getting on with some tin bashing, honest.  But I’ve also been making some more tooling.

You can’t beat having the right tool for the job and I got some pretty useful tools in the haul I bought off eBay.  I got some great post dollies but to really make use of them I needed a tool post to mount them on.

View albumView albumView albumView album

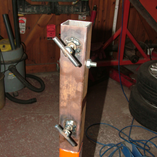
I made a multi purpose tool post which will accept the large barrel post dolly and should accept the stakes that I’ve been looking at on the Frost website.  And I made a Hardy Hole adaptor to accept the smaller post dollies that I got too.

Damn, I wish I’d done it sooner, as it makes life so much easier.  Now I have a Hardy hole I can keep an eye on eBay for some blacksmith tools.

The only way to recover the balls up I made of the rear quarter was to roll my sleeves up, grab the slapper and dolly and drive the neighbours nuts (god bless ‘em for their patience) with the dink, dink, dink of a bit of planishing.

Flexible Sanding BlockGetting it right involves two techniques which I ought to be bloody good at by now.  The first is to use contour gauges to establish where the metal should be and the second involves using an aerosol can of paint and a sanding block to establish when you’ve got it there.

Whilst I was working on the rear quarter I took the opportunity to fill in the hole where the side marker lamp fits on the US spec Spider.  I put a light crown in a piece of scrap sheet and placed it behind the hole, scribed round it, then cut it very carefully to the line with my Gilbow hand shears.  I would normally lightly tack the piece in place with the MIG before fillerless TIG welding it in place.  That leaves a few lumps of filler wire to grind down so I thought I’d try the TIG from the start.  Bad plan, I won’t do that again.

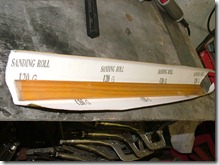
As I welded it in I dressed the HAZ with a hammer and dolly and once it was fully welded in I covered the quarter in a light mist of black “rattle can” paint.  The sanding block I used is a strip of wood from an old louvre door.  It is flexible enough to bend to the contour of the panel but stiff enough to only touch the high spots.  A quick pass with the sandpaper shows the low spots, which are raised with some slapper on dolly action.  Successive passes with block, then slapper until the panel is smooth.  The only paint left is in the grinding marks.

There is another dressing to come when I smooth over the whole panel but you can see that with nothing more than some high build primer the hole is going to be invisible.

This slideshow requires JavaScript.

It was two big lads that look like me but they ran away!

Who am I trying to fool?  That defence never worked when I was kid and nobody is going to believe it now.

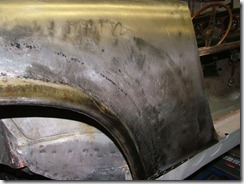
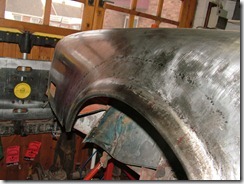
I took one step forward and three back this week when I managed to make a cock up of the rear quarter.  I was using the shrinking disc to blend in the wheel arch and it was going well until I got a bit too eager and managed to gall the rear quarter, both in front and behind the wheel arch.  Suddenly the “good bit” that I didn’t need to touch was shrunk and wrinkled.  Utter stupidity on my part that has cost me a weeks progress.

DSCF1465The shrinking disc is very effective!  You can see the damage inflicted in the upper right of this picture. One careless pass is all it took.  Because my workshop is so cramped I could not position myself to see the work properly and had made a full arc before I realised what I’d done.  What a tit!

So I’ve been rectifying the damage.  And it’s been a useful exercise to be honest.  I found a few dents that the previous “restorer” had filled, so I smoothed those out at the same time.  I’ve got everything aft of the arch pretty close and when I’ve patched the hole where the US model side marker light used to fit, it should be a simple task to give it a final dressing to a filler free finish.

DSCF1463So tomorrow (after the Grand Prix of course) I’ll repair the mess I made forward of the arch and dress that out. Then perhaps I can get back to the task of assembling the inner arch and the bottom corners of the outer arch, jigsaw fashion.

I’ve got to get on with it because there are other jobs backing up that I need to crack on with.  I don’t have time to go to work any more, there’s too much to do.  Where’s that (even modest) lottery win when you need it?

I turned the lip of the arch with a hammer and improvised dolly made from some 12mm bar. The original has an elegant curve on a radius of about 6 or 7mm but mine was a little too sharp and not very consistent.

I don’t have much in the way of T-dollies and I probably wouldn’t have the skill to use them properly anyway so I decided to make a “gizmo” that could produce a consistent radius.  The ideal die would be a piece of old road spring but after dragging out my scrap bin I found that the ones I cut off the Spider have already gone for recycling.  Fortunately my friend Will had recently changed the springs on his 3 Series and offered the old springs up for sacrifice.  These worked very well, with a variety of core diameters and radiuses available they are going to make some excellent T-dollies!  (I’ll make a set for Will too.)

View albumView albumView albumView albumView album

So with the most detailed plans I could fit on the back of a fag packet I set about some steel offcuts and produced the MKI Lipper.

No prizes for guessing how it works, it’s not rocket science.  But after a couple of passes I had a very consistent and professional looking radius around the arch.

I’m looking to buy some Stake or Post Dollies but there are very few places in Britain where you can buy them.  I’ve found some at Frost but they are a quite expensive for what is after all just a hobby.  I can find cheap ones from international sellers on eBay but by the time you’ve paid for shipping…

I’ve been thinking about using the base of one of those disposable welding gas bottles or better still, welding a Citroen suspension sphere to a bit of box section.

Maybe I should stop being so tight and just cough up?

Dilemmas, Dilemmas!