Posts Tagged ‘door’

I’ve been so busy over the last few weeks I’ve not had a chance to blog.  My day job is frantic, I’ve had a jolly to Norway, which is nice…I’d move there tomorrow! And I’ve got the builders in to extend my house.  I’ve still found some time to get a bit done though.

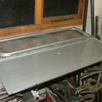
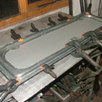
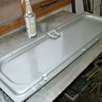
I’ve done a bit of archaeology, digging out the remains of a door from what seems like centuries of filler build up!  There is little detail of the original panel so I had to take great care not to destroy the only evidence of what shape the door skin should be.  I think I’ve got a good pattern from it, we’ll soon see!

That’s always our favourite excuse isn’t it?  “Yes dear, I’m going to fix the leaking tap.  I’m sitting here reading Motorsport Magazine because it’s all in the preparation. You can’t rush these things!”

Well sometimes it’s true.  I’ve spent the last few days sitting, looking and thinking about how to proceed with my repairs.  To get as close to the original construction methods with my repair panels as I can.  It’s critically important too, with a vehicle that you simply can’t by parts for cocking it up would be catastrophic.

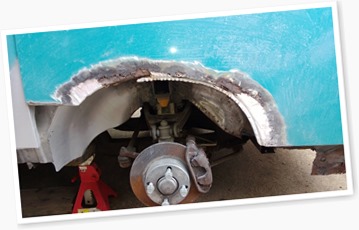
I’ve tried to reverse engineer the foot well, wheel arch and sill non-destructively.  Work out where the original panel start and finish.  Where they overlap and join and therefore how I can unpick the stiches, saving the good parts and replacing the bad.  I’ve ascertained there will be some casualties along the way and investigated how to replace them before I destroy the originals.

One such piece is the A-Pillar.  It’s shot, with a stress fracture right across it at the door hinge.  It also traps a repair panel I made earlier but have yet to fit.  I will never find a replacement and it is absolutely critical to the strength of the vehicle.  So I had a bash (pun intended) at making one using a hammerform.  It’s come out quite well.  I have a bit of dressing to do to pretty it up a bit but the structure is there.  The stress all got a bit too much for it at the bottom but I’m happy to graft a bit on there to finish it off.

View albumView albumView albumView albumView albumView albumView albumView albumView albumView albumView albumView albumView albumView album

Sometimes you just have a change of plan and that’s what I did with the engine cover.  Instead of re-skinning the spare cover I picked up I decided to leave that one in tact.  There is little to no corrosion on it but the skin has some dings and dents.  I decided it would be an interesting exercise to see if I can straighten this out, I might be able to learn some valuable lessons from it.  Not now but in the future.  So I set about the original engine cover and removed the skin.  It was stuffed with a lot of stringy filler and badly corroded all around the outside.

I need to find a better way to strip paint off panels, I really do!  Getting the frame structure for the engine cover back to bare metal took longer than the repairs did but finally I got there.  After Nitromors, Caustic Soda, hot air gun, rotary nylon and wire brushes, flap wheels, scrapers and sand blasting!

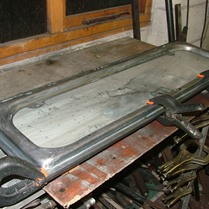
With the paint gone the extent of the corrosion could be assessed and it was pretty bad.  I had to make new sections top and bottom and graft it all together.  My new improved metal folder proved to be improved but not perfect so a bit of manipulation was required.  Ultimately it all came together and I was able to put the new skin on the repaired frame for a test fitting.  Not bad at all.

I decided to bond the two pieces together using structural panel adhesive.  For two reasons really, my spot welder tips are too big to fit the lip on the panel and I wanted to make sure the internal surfaces were better protected than they were when they left the factory.  Everything got a liberal coating of zinc primer before bonding and the end result is quite satisfying.  I can’t wait for the warmer spring when I can apply some paint and see how it looks.

View albumView albumView albumView albumView albumView album

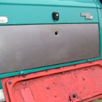
The bottoms of Pandora’s doors are almost entirely made of filler.  That in itself is not the end of the world because like Steve Austin, we can rebuild it! (Yeah, you children of the 70’s know who I mean).

It’s not so easy to rebuild them when you have no idea what they are supposed to look like though. So a couple of weeks ago I posted a cry for help on the FIAT forum in the hopes that the owner of another of these rare old beasts would be good enough to photograph their own doors and send them to me.HPIM03112
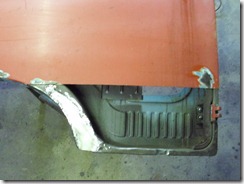
My prayers were answered by the “Citivantastic” Neil Vincent.  Neil not only provided me with pictures of the outside of the doors but, having a door with the skin cut away, was able to provide a valuable insight into the internal features too.  Strengthening ribs, skin flanges, water drains et al!  Thanks Neil, you are a star.

Neil is restoring his own Citivan. A much taller order than most campers because commercial vehicles rarely got the loving attention lavished on them that a member of the family like Pandora has.  Take a look at his handywork so far on this forum post and see what a brave restoration he has taken on!

Keep up the great work Neil and shout up if you ever need help Winking smile

The central locking on my mates Barchetta was throwing a wobbly.  The key would lock both sides from the passenger door but only the drivers door from the drivers side.

That sounded like a switch problem to me so I popped the central locking units out and tested them with a meter.  Sure enough the driver’s side was switching in one direction but not the other.

I stripped the unit down and found the offending microswitch.  It turned out to be a standard item available for a couple of quid from maplins.  So one switch and a soldering iron later and the central locking was as good as new.

This slideshow requires JavaScript.