Posts Tagged ‘rocker’

Progress has been steady over the last few weeks, I’ve had a lot of other stuff on my plate. I’ve refurbished a bicycle for my 5 year old Nephew, work has been chaotic and we’re in building work limbo, awaiting the commencement of work on an extension but I’ve been plodding on with Pandora.

The front wheel arches were badly bodged with filler. It was difficult to discern exactly what shape they were supposed to be, so rather than attempt to make them I ordered some from Italy.  They were NOT cheap but it was a supplier that I’d used before so I was reasonably confident that they would actually show up!  Most of these old stock panels have been on the shelf so long that they’re scratched and beginning to show signs of dry rust.  So they went straight into a bin of caustic which fetches the paint of in no time, then into a bin of Bilt Hamber Deox-C. The stuff rocks!  The black passivated panel then coated with Zinc galv paint which provides pretty good Long term protection (but Weld-Thru my arse!).

Behind the arch and under the tub is an intermediate panel that forms a box section with the new arch panel…or at least there should be, there wasn’t much left.  So with the new Tank Roll bead roller dies I recently purchased I tried my hand at making a new one, similar if not exactly matching what I thought the original looked like.  It was pretty successful for a first attempt and easily good enough.  The rearmost section of this panel is a little more complex in shape and I made this separately using an FSP.  I clamped the new arch to the new sill I made earlier and fitted the intermediary arch panel to the assembly.  The tank rolls were quite frankly obscenely expensive for Made in China crap but they’ve worked well.

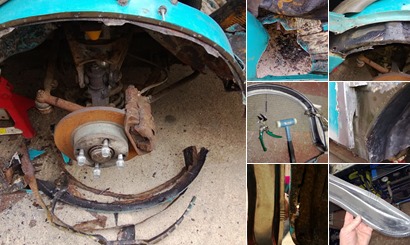
I’ve started to strip all the underseal and paint from the tub and there are some repairs needed there.  I went nuts with the plasma cutter and spot weld cutter to strip off the old arch and badly repaired sections of floor and chassis and things are looking hopeful for reassembly before the builder arrives!  I’d desperately like to see some progress, as forever cutting more rust off it gets pretty demoralising.  Here’s hoping.
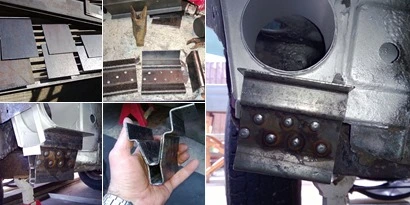
I spent Sunday making something I will never, ever use.  The jacking points on these old FIAT’s are like nipples on a man, (apart from proving that our “Creator” hates joggers) they serve no useful purpose.  The original jacks were rather like the old “monkey up a pole” affair but they had a winding handle at the top to drive a screw thread.  What invariably happened when you used them was that on all but the most even ground, the vehicle weight would shift and the top of the jack would dig into the bodywork about a foot above the jacking point.

The jacking points are useful in that they are a clear indication to tyre monkeys as to where they should jack and I also favour originality.  So I had to create new ones.  I got an excuse to play with the Plasma cutter too and that’s always fun.

I cut some 2mm plate and went to work with my vice bending brake.  It was heavy going, I even bent the handle on my vice but I got there.  The first one needed a tweak or two because it’s not easy getting dimensions off a piece or rust swollen scrap but it turned out pretty well.  After work this week I’ll set about the other three

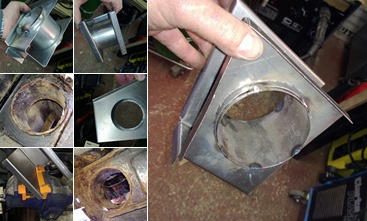
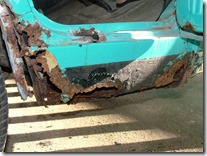
I’ve chased the corrosion back from the sill all the way to the chassis outriggers now.  The rear one has a hole for the petrol tank filler neck and it’s badly corroded at the bottom behind the jacking point.  I deliberated for a while about just repairing the bottom but the thought of trying to remake the afore mentioned hole whilst grovelling underneath left me cold.  I decided to make a whole new outrigger on the bench and graft it on where the cancer ends.  Let the fabrication begin.

I sketched up the piece to be made and took as many measurements as I could from the remains of the original.  It can be really tricky to find suitable reference points to get all the dimensions right and it took a considerable amount of time before I was satisfied. Then I marked out some 18 gauge and started cutting and folding.  I used a plywood template as a guide for the air nibbler to cut the holes which I then flared to accept the tube I created for the filler neck hole.  I’ll cut the old one off and slot the new one into the void created, then MIG weld all around it.  Doesn’t that sound easy.

That’s always our favourite excuse isn’t it?  “Yes dear, I’m going to fix the leaking tap.  I’m sitting here reading Motorsport Magazine because it’s all in the preparation. You can’t rush these things!”

Well sometimes it’s true.  I’ve spent the last few days sitting, looking and thinking about how to proceed with my repairs.  To get as close to the original construction methods with my repair panels as I can.  It’s critically important too, with a vehicle that you simply can’t by parts for cocking it up would be catastrophic.

I’ve tried to reverse engineer the foot well, wheel arch and sill non-destructively.  Work out where the original panel start and finish.  Where they overlap and join and therefore how I can unpick the stiches, saving the good parts and replacing the bad.  I’ve ascertained there will be some casualties along the way and investigated how to replace them before I destroy the originals.

One such piece is the A-Pillar.  It’s shot, with a stress fracture right across it at the door hinge.  It also traps a repair panel I made earlier but have yet to fit.  I will never find a replacement and it is absolutely critical to the strength of the vehicle.  So I had a bash (pun intended) at making one using a hammerform.  It’s come out quite well.  I have a bit of dressing to do to pretty it up a bit but the structure is there.  The stress all got a bit too much for it at the bottom but I’m happy to graft a bit on there to finish it off.

View albumView albumView albumView albumView albumView albumView albumView albumView albumView albumView albumView albumView albumView album

DSCF1980It’s funny how one thing leads to another.  The front wheel arches on Pandora are shot, so obviously I’ve been drawing up plans to make a new petrol tank!

How does that work?

Well the arch meets the sill behind the wheel.  The sill is shot, in best Blue Peter fashion, here’s one I made earlier.  I know the inner sill behind it is also shot and I need to cut away the rust and repair it too.  Right behind the inner sill is the petrol tank.  I didn’t want to go nuts with the plasma cutter when the tank is right behind it, so I dropped it down.  I soon realised that the tank was also shot, hence the mission to create a new one.  I’ll let you know how that goes.

View albumView albumView albumView albumView albumView albumView albumView album

In the meantime I’ve been waving the plasma cutter round like Darth Vader’s light sabre. Sometimes even making that “Whhaaarrm Whhaaarrm” noise and breathing heavily.  Plasma cutters are fun!  Now I can see what I’m up against…

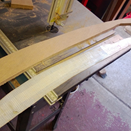
This weeks project has been to make a replacement sill or as our friends across the Atlantic would say “rocker panel”.  I’ve never really understood that but there you go, two nations divided by a common language.

I have never seen a replacement sill for sale either in the UK or Italy.  The ones I’ve got are patches on top of patches on top of gobbo.  So I scoured my manuals and pictures on the internet.  Eventually I found a nice engineering drawing of the van from the side and it became apparent that the sill is essentially symmetrical, which rather pleased me because it means that one pattern fits both sides.  Jules and I took some measurements and made some sketches, then it was on to a paper pattern and transferred to metal.

I had to pay particular attention to the order of operations, as ever some processes would make others impossible.  So first I wheeled a crown over the entire panel. Then transferred the features from the pattern and bent the bottom lip up.  These two operations gave the sheet of steel enough form to become rigid enough to handle more easily.

Next task…create the feature line about 40mm from the top bend.  This gave me more grief than i expected.  My cheap Chinese bead roller has never been particularly easy to drive.  It’s always had a mind of it’s own and marred the work.  It wasn’t any different this time!  I needed to do a bit more modification to it.  I filed the sharp edges from the dies.  God I wish I had a lathe!  And made a guide fence to ensure the lines remained straight.  Eventually I recovered the situation.  The marring isn’t too bad considering the panel will be protected with stone chip coating.   The other side will not be a problem when I make it, the bead roller works nicely now.

The top lip was bent, as the bottom was over a long piece of steel angle. and the front and rear flanges I threw with an old adjustable spanner.  To create the curve I used a combination of shrinking the flanges and wheeling with a rubber tyre.  I marked it up to gimp some drain channels in the bottom edge but changed my mind at the last minute.  The inner sills are sure to be bolloxed too, so I’ll put the drains in the new ones of those so they are invisible to the passing world.  I’m chuffed with the result and can’t wait to make one for the other side.

This slideshow requires JavaScript.

Gina’s sills needed a lot of work.  Check out the first chapter in this horror story here.