Posts Tagged ‘wheel tubs’

Progress has been steady over the last few weeks, I’ve had a lot of other stuff on my plate. I’ve refurbished a bicycle for my 5 year old Nephew, work has been chaotic and we’re in building work limbo, awaiting the commencement of work on an extension but I’ve been plodding on with Pandora.

The front wheel arches were badly bodged with filler. It was difficult to discern exactly what shape they were supposed to be, so rather than attempt to make them I ordered some from Italy.  They were NOT cheap but it was a supplier that I’d used before so I was reasonably confident that they would actually show up!  Most of these old stock panels have been on the shelf so long that they’re scratched and beginning to show signs of dry rust.  So they went straight into a bin of caustic which fetches the paint of in no time, then into a bin of Bilt Hamber Deox-C. The stuff rocks!  The black passivated panel then coated with Zinc galv paint which provides pretty good Long term protection (but Weld-Thru my arse!).

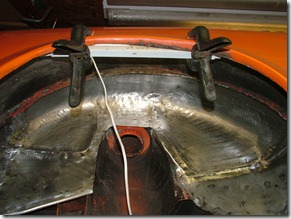
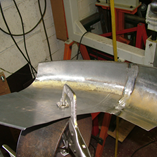
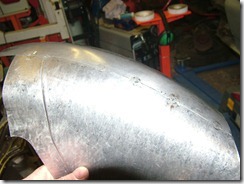
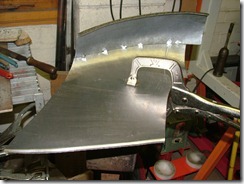
Behind the arch and under the tub is an intermediate panel that forms a box section with the new arch panel…or at least there should be, there wasn’t much left.  So with the new Tank Roll bead roller dies I recently purchased I tried my hand at making a new one, similar if not exactly matching what I thought the original looked like.  It was pretty successful for a first attempt and easily good enough.  The rearmost section of this panel is a little more complex in shape and I made this separately using an FSP.  I clamped the new arch to the new sill I made earlier and fitted the intermediary arch panel to the assembly.  The tank rolls were quite frankly obscenely expensive for Made in China crap but they’ve worked well.

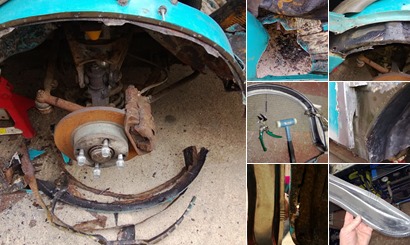
I’ve started to strip all the underseal and paint from the tub and there are some repairs needed there.  I went nuts with the plasma cutter and spot weld cutter to strip off the old arch and badly repaired sections of floor and chassis and things are looking hopeful for reassembly before the builder arrives!  I’d desperately like to see some progress, as forever cutting more rust off it gets pretty demoralising.  Here’s hoping.
That’s always our favourite excuse isn’t it?  “Yes dear, I’m going to fix the leaking tap.  I’m sitting here reading Motorsport Magazine because it’s all in the preparation. You can’t rush these things!”

Well sometimes it’s true.  I’ve spent the last few days sitting, looking and thinking about how to proceed with my repairs.  To get as close to the original construction methods with my repair panels as I can.  It’s critically important too, with a vehicle that you simply can’t by parts for cocking it up would be catastrophic.

I’ve tried to reverse engineer the foot well, wheel arch and sill non-destructively.  Work out where the original panel start and finish.  Where they overlap and join and therefore how I can unpick the stiches, saving the good parts and replacing the bad.  I’ve ascertained there will be some casualties along the way and investigated how to replace them before I destroy the originals.

One such piece is the A-Pillar.  It’s shot, with a stress fracture right across it at the door hinge.  It also traps a repair panel I made earlier but have yet to fit.  I will never find a replacement and it is absolutely critical to the strength of the vehicle.  So I had a bash (pun intended) at making one using a hammerform.  It’s come out quite well.  I have a bit of dressing to do to pretty it up a bit but the structure is there.  The stress all got a bit too much for it at the bottom but I’m happy to graft a bit on there to finish it off.

View albumView albumView albumView albumView albumView albumView albumView albumView albumView albumView albumView albumView albumView album

I’ve had a couple of “light bulb” moments this weekend. The sort where you don’t even realise there is something you can’t see until you see it.

I’d got the new arch repair held in place with Cleco’s and was working the lip on the outer tub.  It was giving me some real grief because turning the lip to fit exactly to the lip on the arch repair is very difficult to achieve.  The shape of the panel changes with even slightest alteration to the lip.  After a couple of hours of banging my head against a brick wall I decided to cut the lip off and make an entirely separate piece, then graft the two together.

After cutting off the lip it dawned on me that with the lip in place I’d never have got the panel into situ when the arch is fitted.  As I alluded to in an earlier post I need to fit the arch repair without the tub in place so that I can get a dolly behind the weld and dress out the shrinkage, then fit the tub behind the arch.  Fortunately this revelation happened before I welded the two pieces together!

So after fabricating the new lip I set about the task of preparing to fit the arch.  I trimmed the outer edge of the arch and cleco’d it to the quarter. Then I scribed a line along the joining edge onto the quarter and put indexing marks to help locate the panel after cutting.

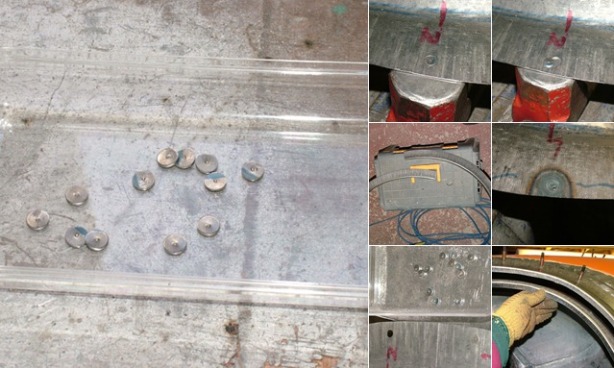
Once cut the cleco holes will be of no use, so I set about making good.  First I used my Roper Witney hole punch to enlarge each 1/8” drill hole to 1/4”.  Then using “flash” punched from a piece of scrap sheet I plugged the holes by inserting and “setting” the small discs into the holes in the arch.  Then a quick wizz round with the TIG and the holes are gone.

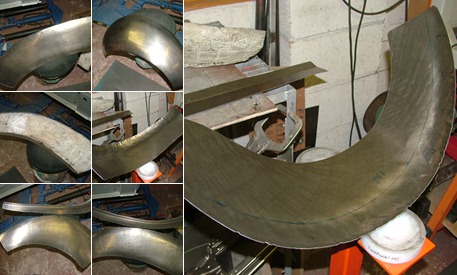
Wow! That was fun!  Possibly the most difficult piece I’ve made to date, I’ve pretty much completed one arch.

I took an FSP from the “good” side. It wouldn’t really turn inside out but did allow me to transfer the features to the sheet steel.  Last time my index holes were a little too big so I made a makeshift hollow punch from a couple of roll pins.  These were much more accurate to line up with.

I started by wheeling a bit of shape into it, taking care to avoid the blue line by running some masking tape over it. It wasn’t putting the shape in fast enough so I took the bull by the balls and switched to the bag and bossing mallet. A couple of passes and the shape began to appear.

I made a set of contour gauges from the “good” side.  Lined them up with my index holes and used them after each dressing to make sure I was heading in the right direction.  I worked each area a little at a time, with a slapper & dolly and stretcher. Every time I worked it in one place it would affect it somewhere else!

Once happy with it I cut the lip off the old bodge repair and put some indexing holes through both panels, then put some Cleco’s in to hold the arch in the right place while I work the outer tub.  Once it’s ready to butt weld in place I’ll plug the holes using the discarded flash from my Witney hole punch…more on that later.  Just a few finishing details to add but I’m happy with the outcome.

This slideshow requires JavaScript.

My Spider wheel tub repair is dependant on getting the wheel arch repaired and vice-versa.  So I need an arch repair panel before I can go any further.  It’s a complicated panel with a lot of compound curves and the thought of making one gave me palpitations, so I decided now was the time to open my wallet and buy some of the bits that I can’t avoid having to buy!

There is a specialist supplier in Germany who a lot of UK owners have reported using at some time so I went to their website, downloaded their catalogue and looked up the bits I need.  Having put about £500+ worth of bits in my basket I found that their order page does not appear to be secure.  So I used their email contact details to request a total price for purchase and shipping….that was over 2 weeks ago and I’ve not had a reply.  I’m hopeless at languages so I don’t see the point of making an international phone call to someone I can’t communicate with.  I tried a couple of other online German suppliers, who didn’t have the parts I wanted in stock.

So there’s no alternative, I’ve got to make the wheel arches….

Watch this space!

DSCF1380The inner tub is finally welded in place. It was a bit of a wrestling match as the heat required to MIG the spot welds caused a bit of distortion and places where it used to fit suddenly became a mile out.  After a bit of a thrashing with a slapper I eventually made it fit like a stocking on a chicken’s lip.

I have yet to fit the outer tub and wheel arch…and that is where it becomes complicated.  I need the outer arch repair to know where to turn the lip on the outer tub and I need the outer tub in place to get the arch repair to fit in the correct place. But I need the outer tub out again so that I can dress the welds on the wheel arch and get the bodywork back to the right shape.  Then I can finally weld the outer tub in.

The heavy reinforcing gusset will be last on the agenda.  I suspect if I put it in before fitting the outer tub, the distortion will be so great that the two pieces will no longer fit together!

My inner tub has had a final fitting and is about to be welded in place.  I have almost completed the outer tub but I can’t finish it yet.  The wheel arch is entirely bodged up with filler so until I have the new arch fitted I’m not going to turn the lip that mates with the arch.  I’d probably find that they didn’t line up and the critical bit is that it looks right from the outside, nobody is going to look under the arch.

Having got the flange where the two tubs meet to line up I cut away the old inner tub.  The box sections behind are in good shape, so I just Metal Readied the cleaned areas prior to welding and spayed a little zinc inside the cavities.  Then slotted in the new piece, aligning it with the existing panel.  Once it’s all stitched up I’ll repeat for the outer and all should be where it’s meant to be!

This slideshow requires JavaScript.

The outer half of the Spider wheel tub is coming on nicely. The TuckPuck is great for getting the bulk of the shape into a panel like this.  It took a couple of hours to get each section shaped and I’m about ready to trim the joint line and zip them together.

All the pieces of the first wheel tub came together today.  Ably assisted by Jules I stitched the component parts together and it looks like it should.

I have a bit of final dressing to do when the outer shell is complete and I can see how the two fit together but it’s pretty much there.

The next piece is already cut out and taking shape.

Like it should have been in the first place!

I have been busy again recently, so not made as much progress as I’d hoped.  But as well as uploading a batch of photo’s to my stock library I did manage to get the wheel tubs back on track.

DSCF1346

DSCF1344

Having nearly lost the use of my hands through pounding shape into these panels I adopted plan B and made them in sections.  Here’s the first one tacked up ready to TIG.  I’ll get all the sections tacked together and then blitz them up in one